
Campaigns & email
One-Time Offer with MailerLite
Connect the new MailerLite and build an email sequence for your One-Time Offer campaign.
Added to the help center: October 12, 2026
On this page
This guide will show you how to set up campaigns with One-Time Offer and with Apresly’s countdown timer, which starts counting down when a user joins your email list.
Get your MailerLite API token
- Log in to your MailerLite (new) account.
- From the side menu, select “Integrations”, choose “Generate new token” and copy the generated token.
Integrate MailerLite (new) with Apresly
- Log in to your Apresly account.
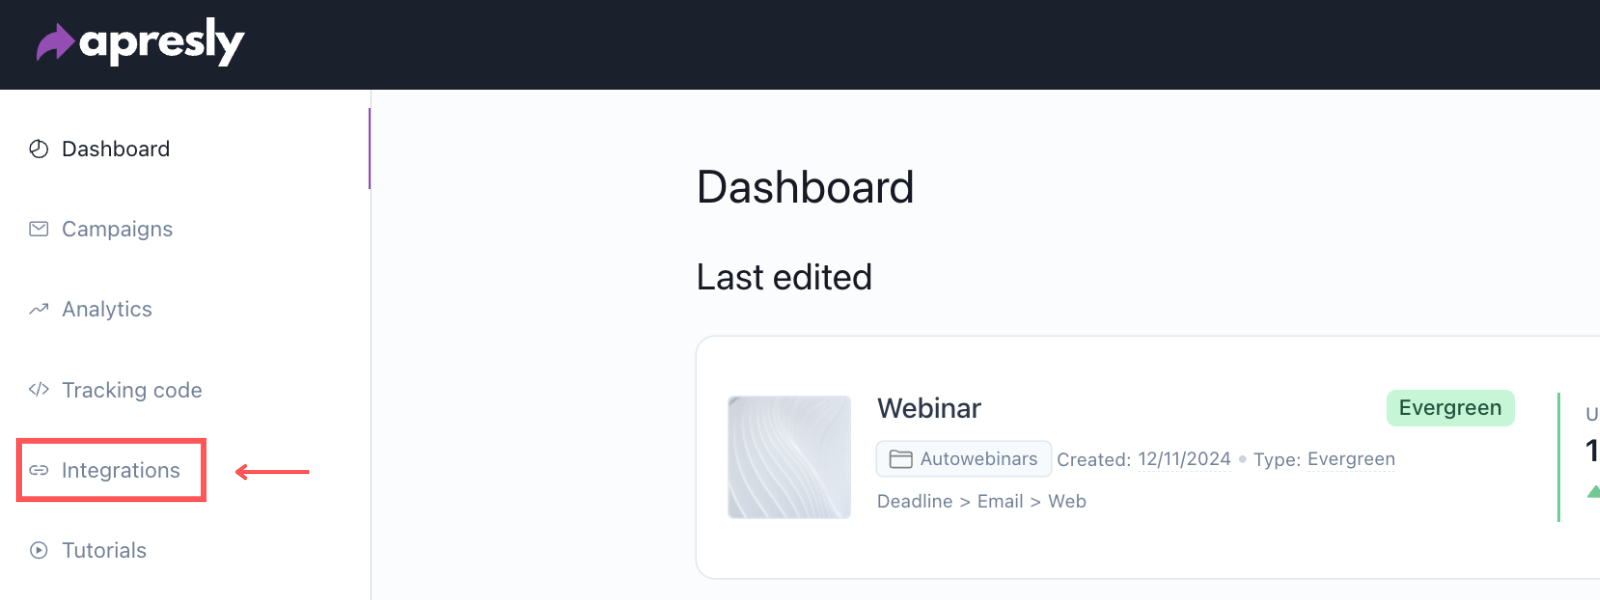
- From the side menu on the left, select “Integrations”
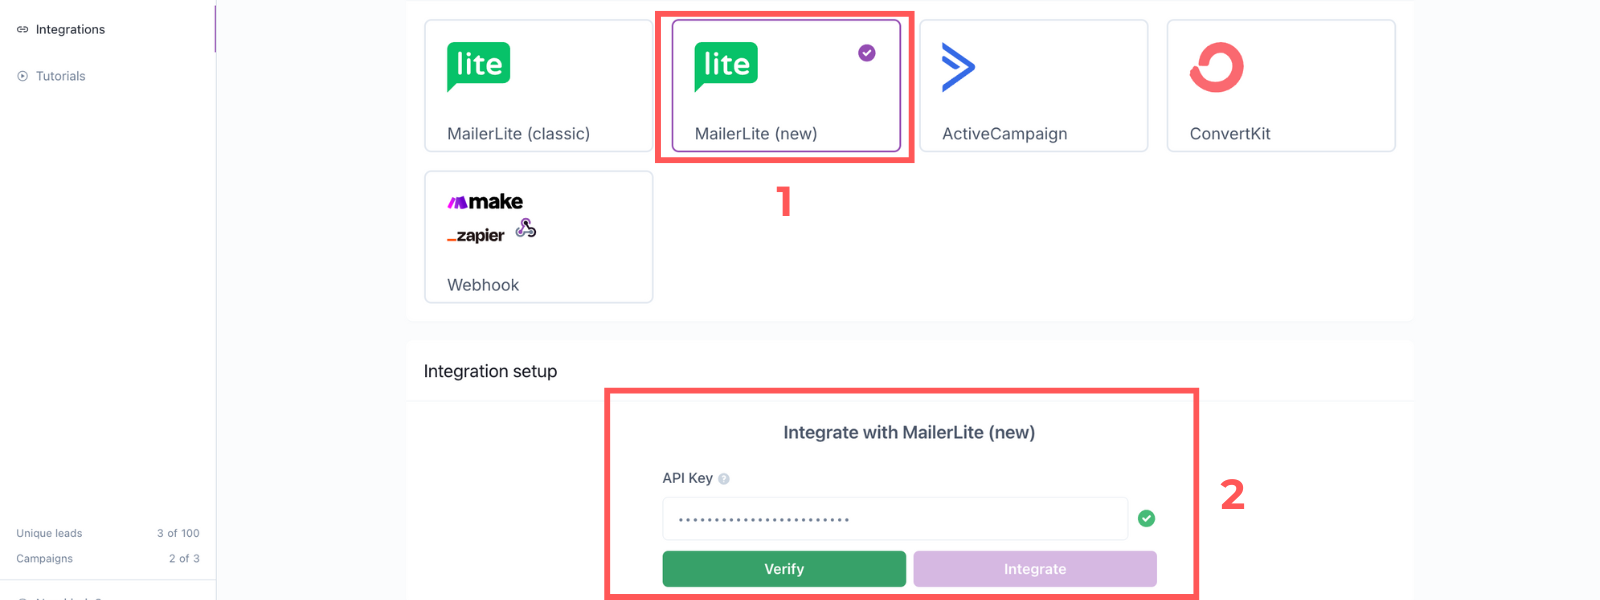
- Select MailerLite (new) from the list of available email providers (1), then paste the API token you copied earlier into the field below. Click the “Verify” button (2).
Campaign setup in Apresly
- From the side menu on the left, select “Campaign”
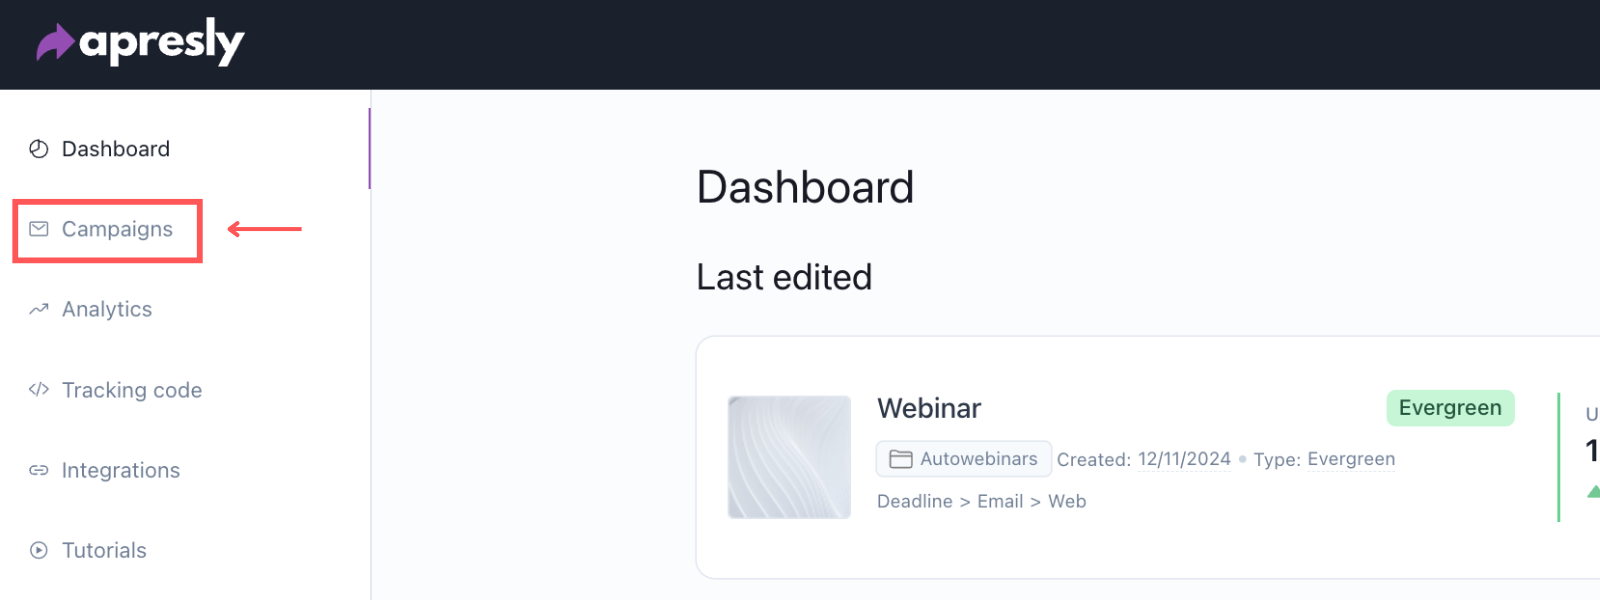
- Click the “New Campaign” button.
- From the available campaign types, select “One-Time Offer” and click the “Next” button.
- Name the campaign and select a category for it.
- Set up deadlines for your campaign and time zone.
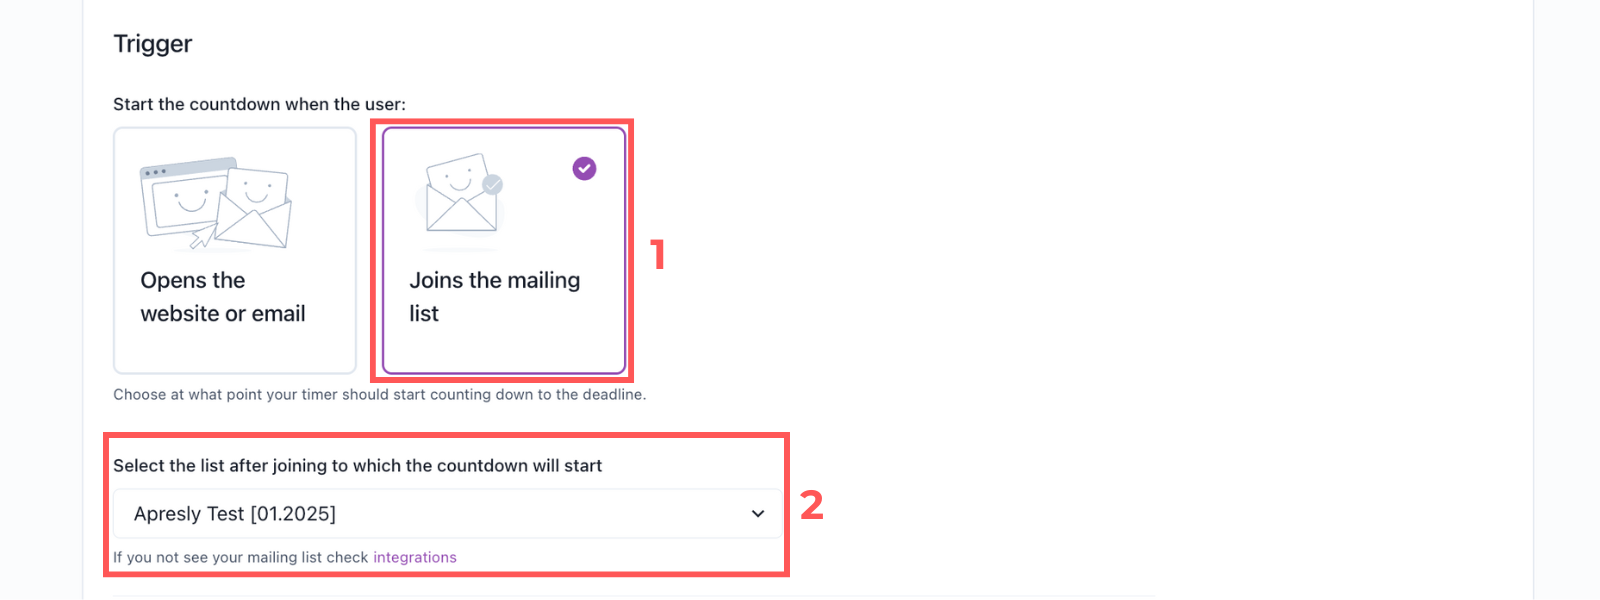
- Select “Joins the mailing list” as the trigger (1), i.e., the moment when the timer starts counting down. Then choose the list after joining to which the countdown will start (2).
- Decide what should happen when the countdown is over.
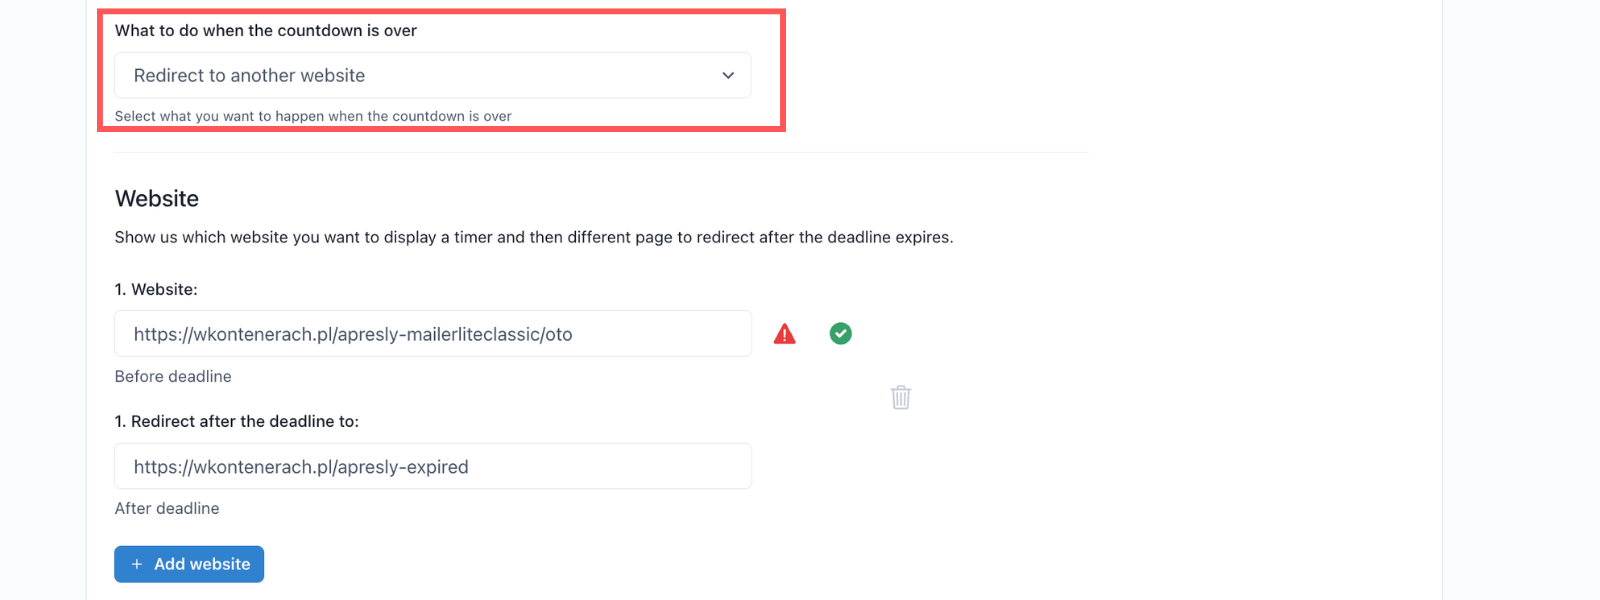
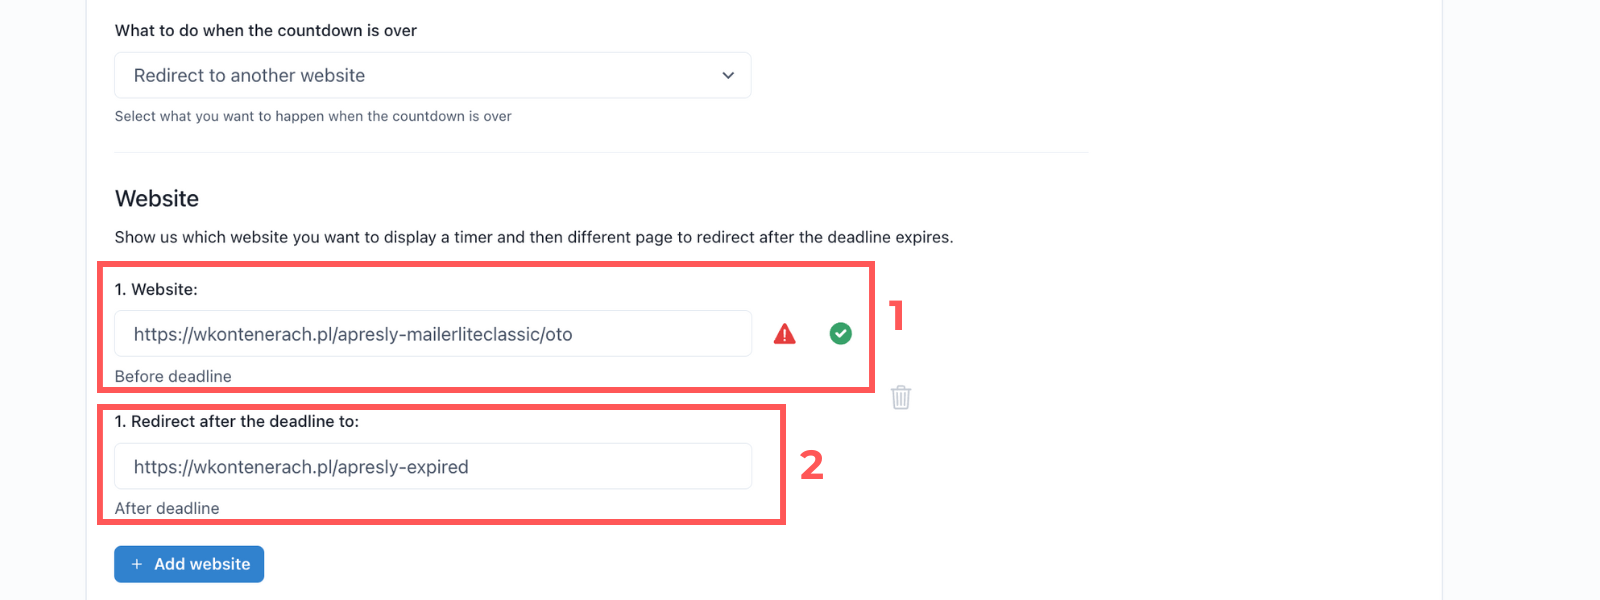
- Show which website you want to display a timer (1) and then a different page to redirect after the deadline expires (2). Click the “Next” button.
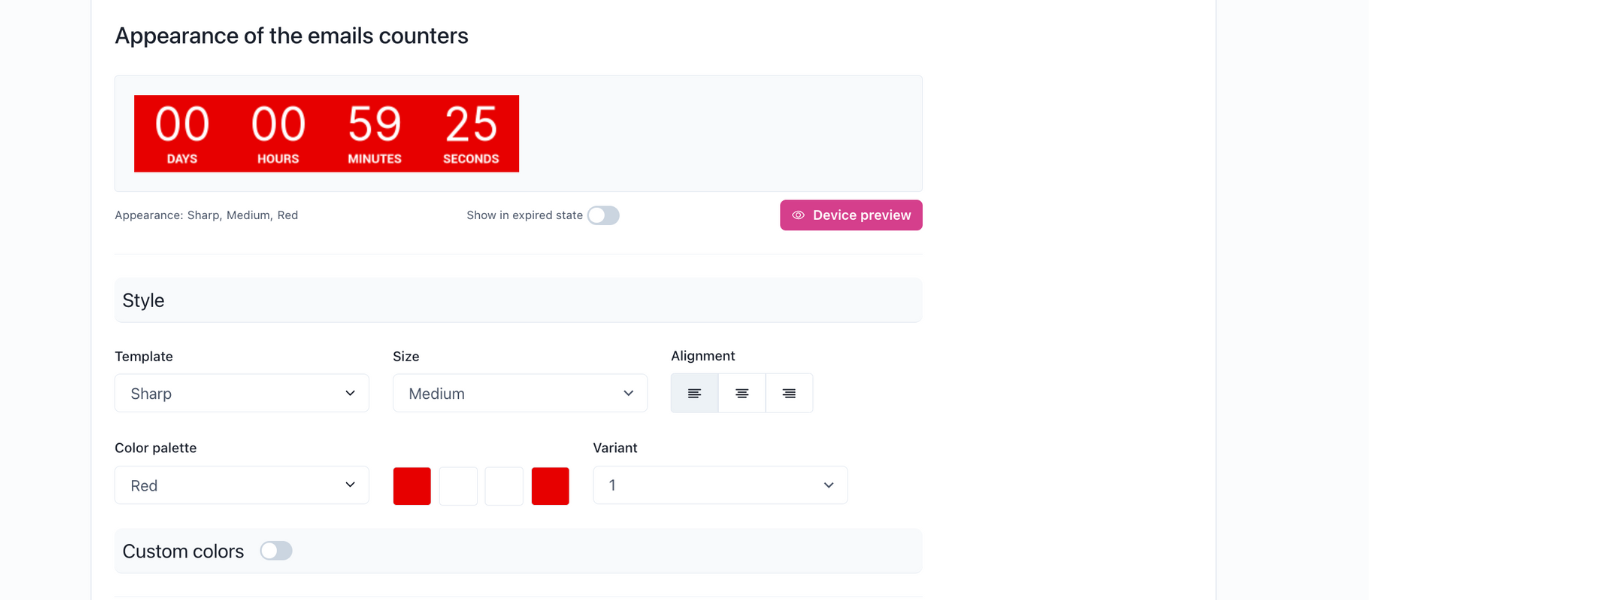
- Customize the appearance of the countdown timer in the email.
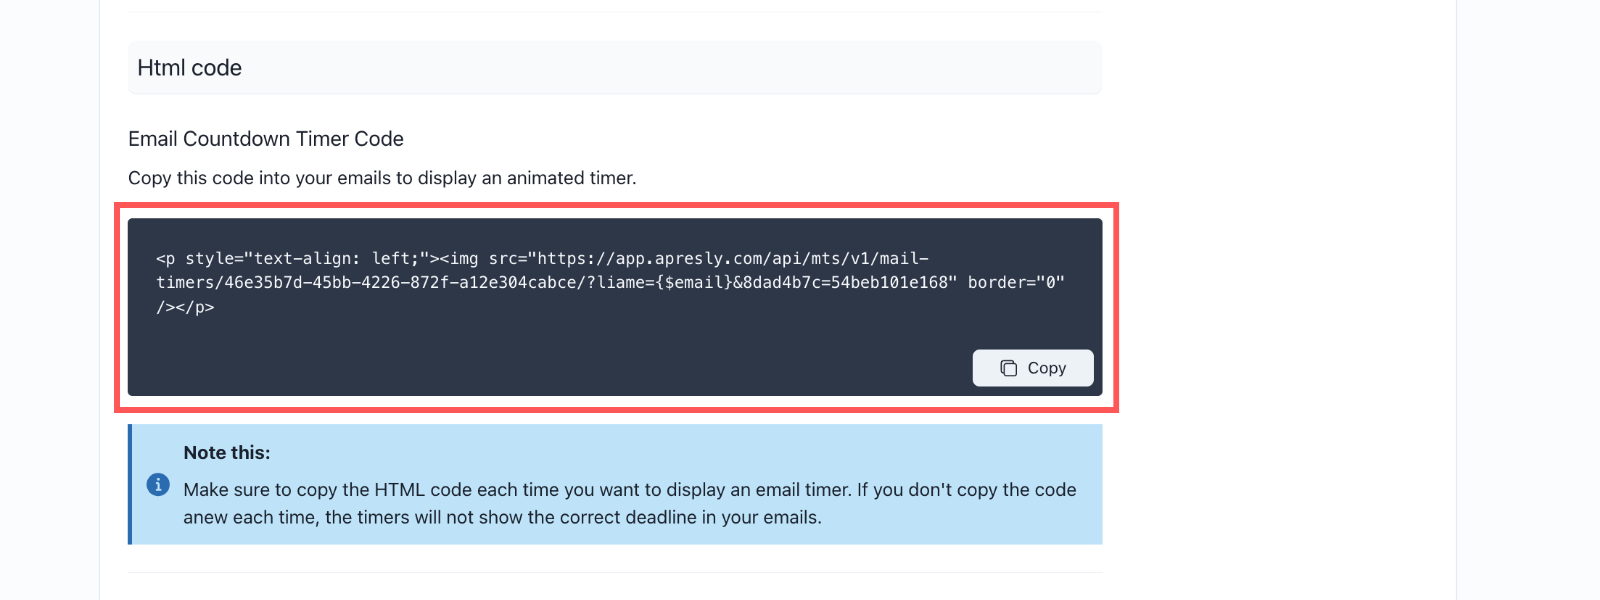
- Paste the HTML code each time you want to display an email timer in MailerLite.
- Use the Email links in your emails when linking to these pages, instead of the actual URLs.
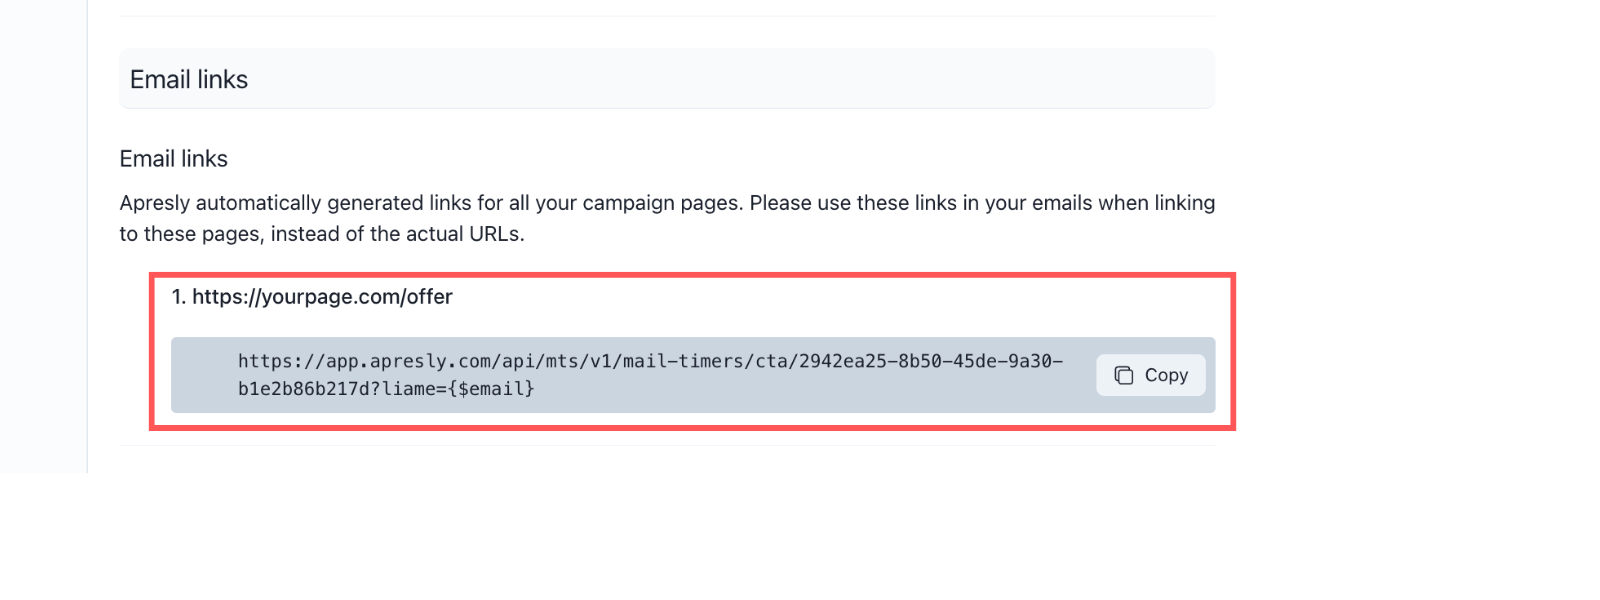
- Customize the appearance of the countdown timer on the page and click the “Next” button.
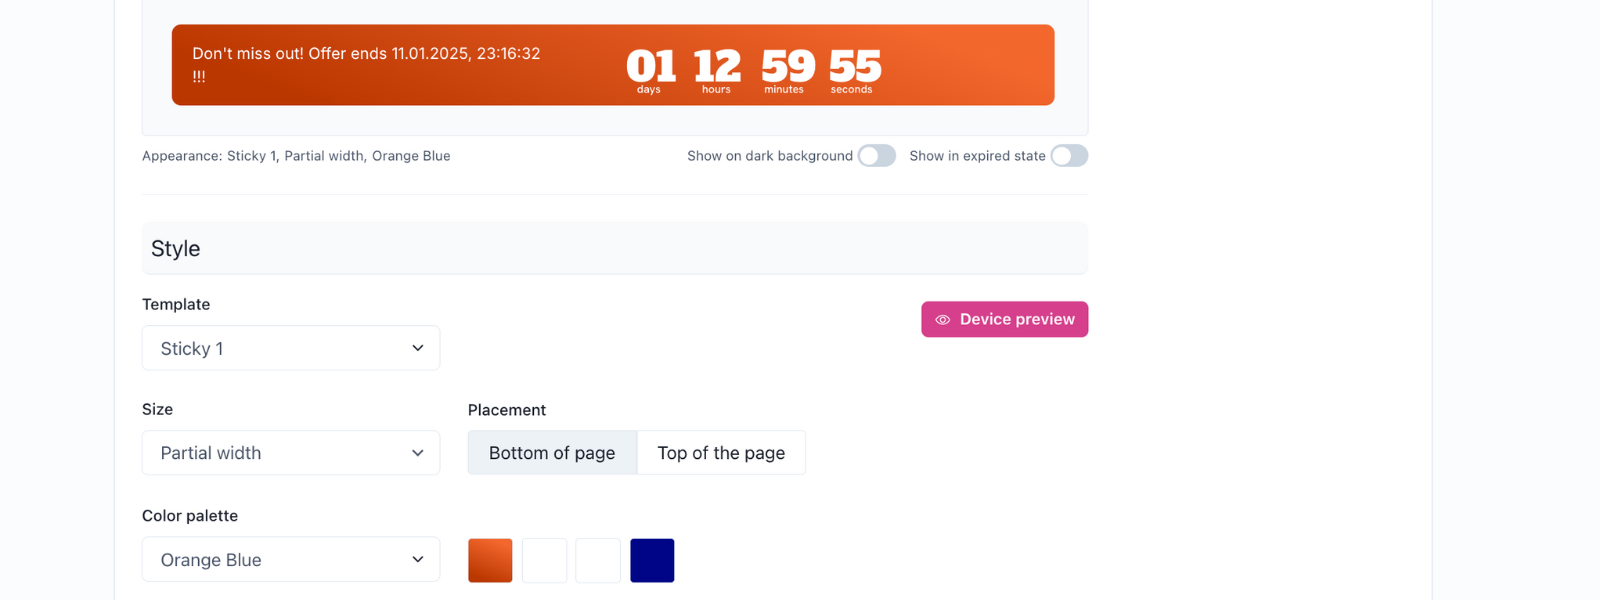
- Review the Overview summary and click the “Update” button.
Create an email sequence in MailerLite (new)
- Open MailerLite and go to the “Automation” tab (1), then click “New automation” (2).
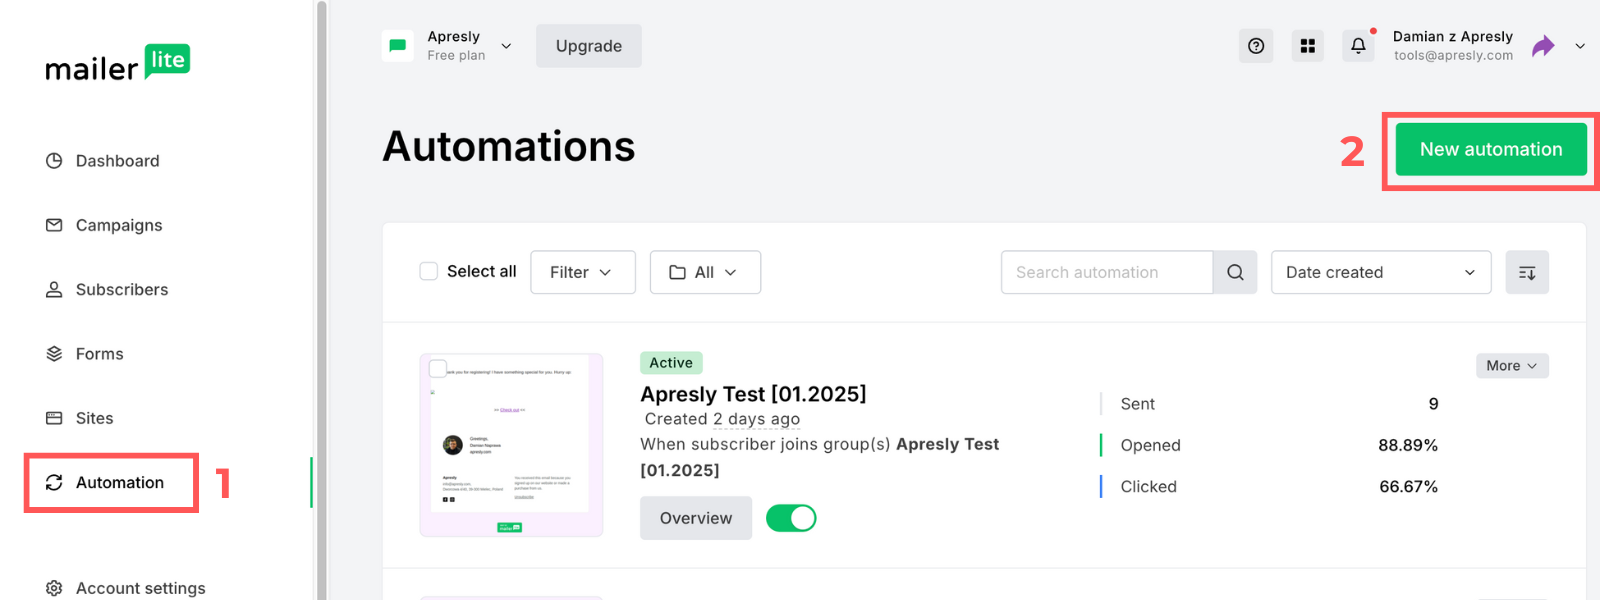
- Name the workflow. Set the workflow trigger to “When a subscriber joins a group” and select the group created for your webinar.
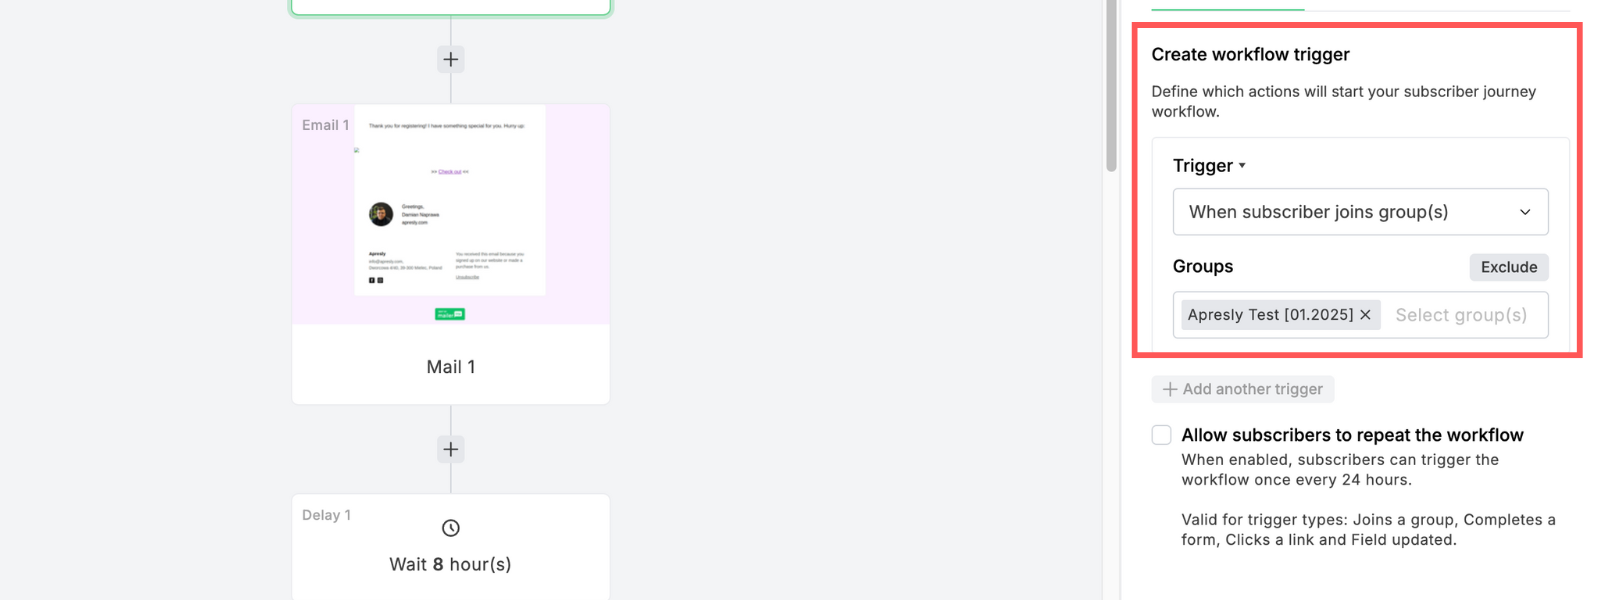
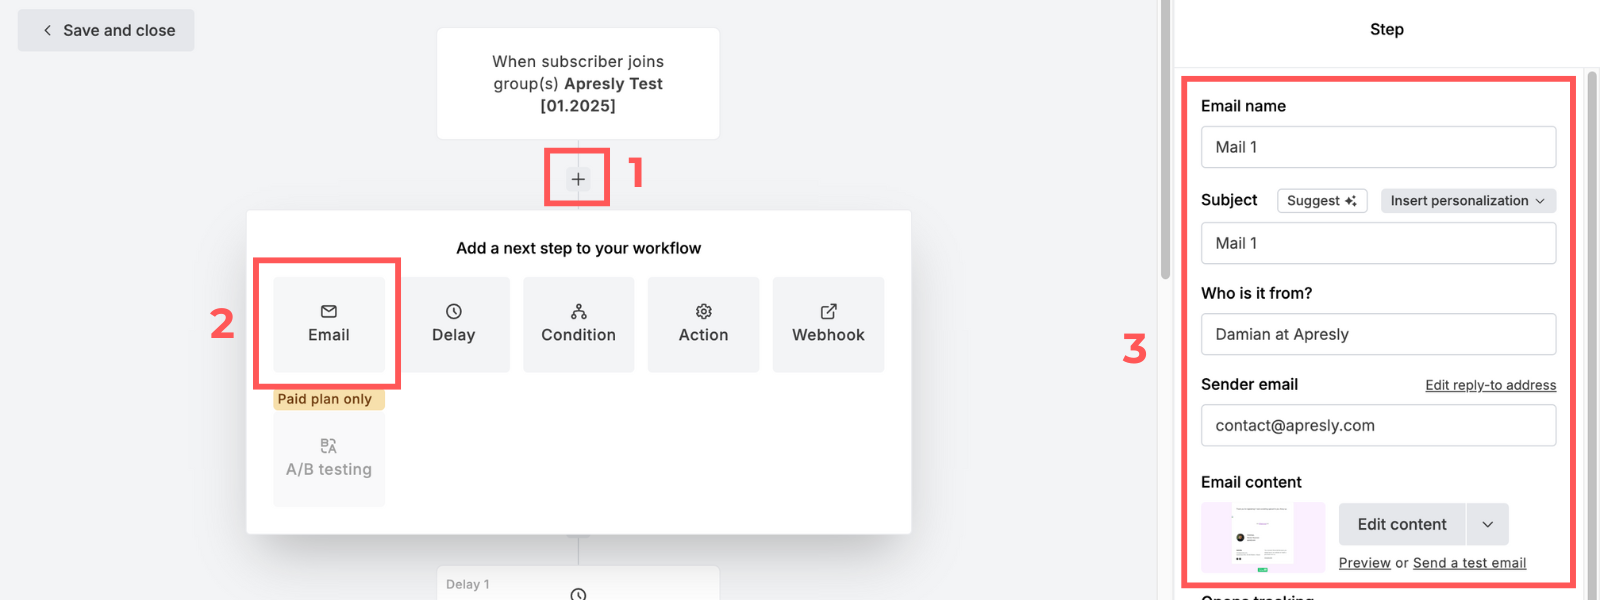
- Using a plus (1), add the first email to the sequence (2). Name the email, title it, and proceed to edit the content (3).
-
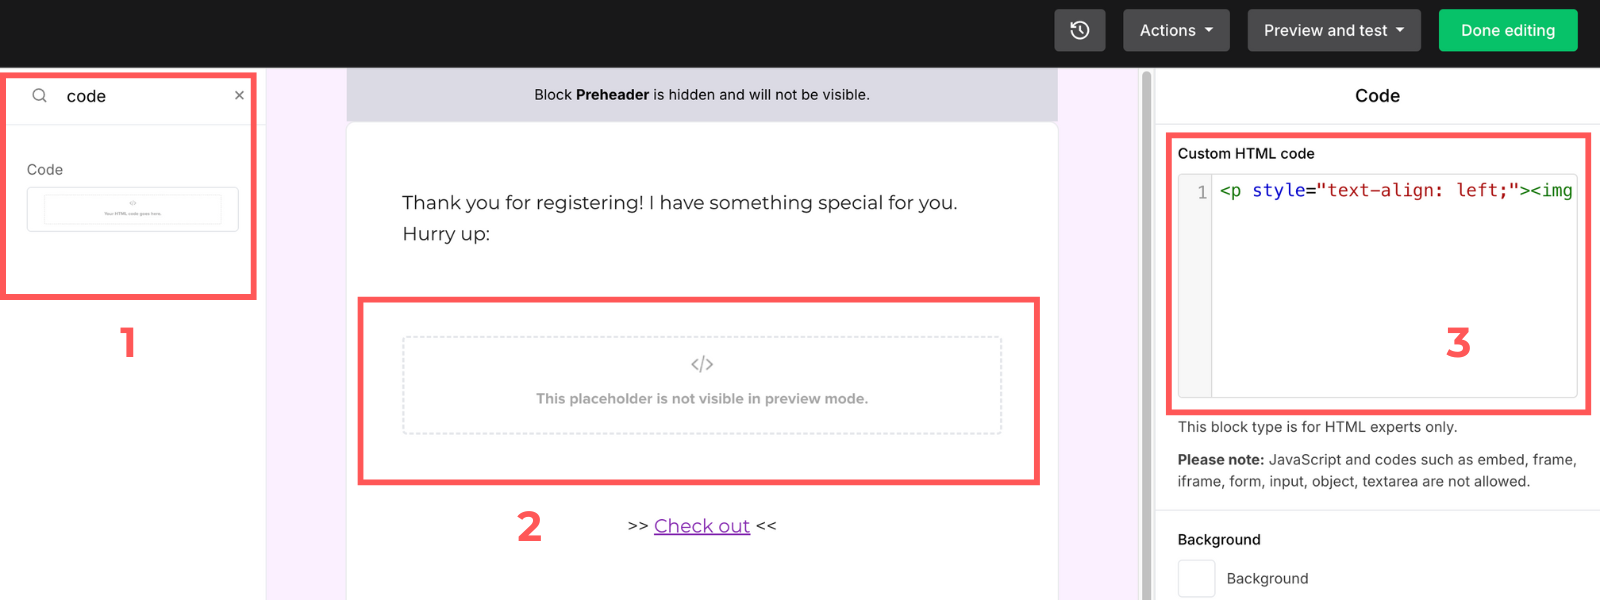
To add a timer in the body of an email, find “code” (1) in the sidebar on the left and drag the block to the appropriate place (2). Then click the code block and in the space on the right paste the HTML code from Apresly that you copied earlier (3). Click the “Ok” button and finish editing the email.
-
Before each time you edit an email, click “Save” to make sure your changes are saved.